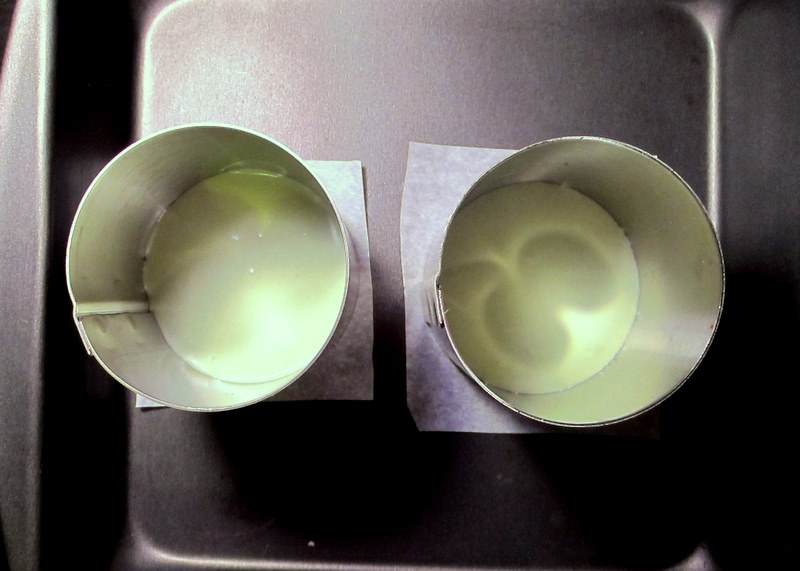
I recently purchased a new cooking magazine with some pretty interesting recipes, one of which is this lychee yogurt mojito freeze. Essentially lychee yogurt mojito, but with the mojito being in shaved-ice form instead of liquid. The result - a very refreshing dessert perfect for cooling off in the summer season!
I will update more details on how i had made it, but here's a sneak peak of the final product!
<3 Ney
Thursday, June 30, 2011
Wednesday, May 18, 2011
green tea (matcha) custard mousse cake - 抹茶紅豆卡士達慕司蛋糕
I tried making peche legere over the past summer and it was a huge success following le cordon bleu's recipe. The texture of mousse cakes is just so much lighter and refreshing than regular cakes baked from flour. So this time i decided to try making green tea mousse cakes. I made small individual cakes, although im sure it would work just as well if you were to scale it up to make a large cake for cutting.
Materials:
A. custard powder to make custard (or u can make custard from scratch too)
B. Pancake mix
C. Sugar
D. Milk
E. brown sugar (optional)
F. green tea (matcha) powder
G. 1/2 pack gelatine
H. forming rings
I. toast
J. heavy whipping cream
K. redbean paste
Directions:
1. take a slice of toast, and cut it into a round shape using the forming rings for the mousse cake. If you are scaling it up to make a large cake, u will not be able to use the toast as your crust, u would need to bake a sponge cake and cut the sponge cake with your large forming ring in order to get a large enough piece for the bottom. If you're making small ones like me here, u may also use a sponge cake if u prefer, in that case, skip steps 1 and 2 and replace by using a sponge cake in the place of the toast.
2. place some sugar in a heated pan with a few drops of water and heat the sugar until it melts. before it caremelizes, place the round toast pieces u just cut into the pan to glaze at least 1 side of it with the melted sugar. you may then use the same pan to fry some pancakes. for each small cake, you would need 2 small pancakes that are slightly smaller than the toast rounds u made for the base. you may also use a sponge cake in substitution of pancakes here. after frying the pancakes, you would want to prepare some custard. follow the directions on the custard powder packaging.
3. heat 1/2 cup of milk in a pan along with ~1 tablespoon of matcha powder and 1/3 cup of sugar (may adjust based on personal preferences). stir/whisk until smooth.
4. add in ~1/2 pack of gelatin powder to the mixture prepared in step 3 and use 2 spoons to completely dissolve it into the contents of the pot. keep the contents hot, but do not bring to boil.
5. turn off the heat to the pot, and allow the content to cool. you may speed the cooling process by placing the pot with its contents in it over cold water while stirring to cool.
7. now take 1 piece of the pancake prepared in step 2, put a small piece of custard and lay a ring of red bean paste around it. then take another pancake and sandwich this.
8. slowly pour the cooled green tea/milk/gelatine mixture into the bowl with the whipped cream while mixing with a whisk or spatula. mix until the contents are smooth.
9. place a piece of parchment paper big enough to cover the entire circular base of the mousse rings on a baking pan or flat plate. then place the mousse rings on top (u may also line the inside walls of the mousse rings with parchment paper for easier removal of the cakes after they are done. i didn't do this, so I will show u how you can still remove them if u don't). then place the piece of toast/sponge cake prepared in step 1 inside the ring as the base of the cake.
10. pour a layer of the mixture prepared in step 8 into the rings. the layer does not have to be very thick, a layer as thick as the toast/sponge cake base is enough. then place the "sandwiches" prepared in step 7 on top of the thin layer of the mousse mixture.
11. next, pour in the remainder of the mousse mixture. you should pour in at least an amount that will cover the sandwiches. after that point, you may decide how tall you would like to make your cakes and adjust the amount accordingly. place into the refrigerator for ~2 hours to overnight.
12. remove them from the refrigerator before serving. if you did not use parchment paper to line the inner walls of the ring, take a blow dryer and heat the walls of the ring from the outside. This will melt a thin layer of the mousse along the inner walls of the ring and allow for easy removal of the cakes. then gently pull the rings up, you may need to wiggle them a bit to remove the cakes.
13. you may garnish the top with more green tea powder, or any other powder of your choice. pass it through a thin mesh sieve to allow for even sprinkling of the powder.
additionally, you may add chocolates, berries, other dressings to garnish the top! i chose chocolate, strawberry, and blueberries for mine.
and there you go! your very own home-made green tea mousse cake! of course u may substitute the flavors around for the recipe to make chocolate, vanilla, or any flavor of your choice! so have some fun and experiment with it!
now go and eat your cake before it begins to melt in the heat!
enjoy :)
<3 Ney
Wednesday, April 27, 2011
creme brulee - 焦糖布丁
Materials:
A. 1 pint of heavy whipping cream (or heavy cream)
B. ~1/2 tblsp. vanilla extract (may add or subtract based on personal preference)
C. 5 6oz. ramekins
D. 5 strawberries (optional)
E. 6 large egg yolks
F. 3/4 cups of sugar
*prepare ~3 additional tablespoons of sugar on the side for making the sugar crust before serving
Directions:
1. Pour the heaving whipping cream into a pot and heat it over the stove with small-medium heat. keep an eye on this and do not allow the cream to boil. when you see a rim of small simmering bubbles forming on the surface of the cream, turn off the fire or remove it from the stove. Move onto step 2 while this is heating, but again, keep an eye on it.
2. add the sugar into to egg yolks in a mixing bowl and whisk gently to combine. there is no need for vigorous beating here, the goal is the combine the yolks and the sugar.
3. after the cream has been heated and removed from the source of heat, begin slowly dripping the hot cream into the yolk + sugar mixture prepared in step 2 while mixing/whisking gently to combine the ingredients. It is important that the cream is added SLOWLY to the yolks and mixed while it is being added. if the hot cream is added too quickly or not mixed while being added, it will cook the yolks and you will end up with flakes of cooked egg yolk instead of the final smooth egg/cream mixture.
4. after all the cream has been added, add in the vanilla extract and mix well. then strain the batter through a sieve to remove any clumps/flakes of cooked egg and foam that may have formed while mixing.
5. pour the mixture into your ramekins until they are 90% full. do not fill it to the rim. the mixture is very thin (you should realize it at this point) so if you fill it up too full, it will be difficult to move them to the oven for baking later. pre-heat your oven to 350F (~180C).
6. place the ramekins in a baking pan or oven-friendly container that has a little depth to it. heat some water in a pot on a stove and pour the hot or boiling water into the pan carefully so 3/4 of the ramekins are submerged.
7. move the entire tray with the ramekins and water in it into the pre-heated oven and bake. If you are using shallow ramekins, they should be ready in 25-30mins. if you're using deeper ones like me, it will take ~ 45 mins. You may place the tray on the lower level of the oven racks to avoid the tops from burining, and assist with the cooking of the creme brulee below the surface. check for the progress by inserting a knife or fork to see if it is cooked.
8. remove from the oven and allow the creme brulee to cool at room temperature. then cover with saran wrap and move into the fridge. refridgerate for ~3 hours to overnight, or they may be kept for ~3 days or so without going bad at all in the fridge.

9. before serving, remove from the fridge, dab the surface dry (in case of an condensation in the fridge). then sprinkle some sugar over the top.
10. turn on your oven to the "broiler" setting and place your creme brulees in a row along the broiler at the top of the oven. The ramekins should be ~1 inch away from the broiler itself on the ceiling of the oven. allow them to broil for ~3 mins while checking their status. turn off the broiler and remove them from the oven once the sugar appears to be caremelized (Brownish in color).
11. after cooling (Which only takes a couple of minutes, max), the sugar will have formed the signiture sugar crust of creme brulees.
you may garnish them however you like. I paired mine up with a strawberry to balance out the sweetness with the natural fruity taste of the berry. some people enjoy whipped cream over it, or caramel etc. play around and add what you prefer!
now its time to eat! enjoy your fresh home made creme brulee!
bon appetit!
questions, concerns, suggestions welcomed! just drop me a line in a comment below!
<3 Ney
Saturday, April 16, 2011
soymilk rice ball dessert [紅豆草莓抹茶豆奶白玉]
Sticky rice balls are commonly made with glutinous rice flour mixed with plain water and either cooked in water, or steamed in a steamer. truthfully speaking, they taste good made with water, but wouldn't it be nice if we also added a little more richness to the original aroma of rice? So this japanese stlye dessert was originall made with milk, but since i only had soymilk and soymilk has the additional scent of soybeans, i decided to give it a shot. I paired this dessert up with redbean (Azuki bean) paste, green tea ice cream, and fresh strawberries along with condensed milk drizzled over the top. It tasted absolutely phenomenal, so I decided to share it with all of you. Here we go!
Materials:
A. condensed milk
B. redbean (Azuki bean) paste (maybe home made or commercially available too)
C. Soymilk (may be substituted with milk)
D. fresh chopped strawberries
E. glutinous rice flour
green tea (matcha) ice cream (not shown)
Directions:
1. take a small portion of the glutinous rice flour and mix it with some soymilk until it turns into a smooth piece of dough (it should not stick to your hands). roll the dough into a ball then press down onto it so it more or less resembles a pancake (the thinner shape allows for faster cooking of the dough).
2. boil some hot water in a small pot. once the water has come to boil drop in the litle piece of dough made in step 1 and allow the dough to cook in the hot water. The dough should start off sinking to the bottom of the pot, as it cooks the dough will gradually rise to the surface. Once it has floated to the surface, allow it to cook for another 30seconds to 1 minute to enusre that the dough is fully cooked.
3. remove the dough from the hot water pot (do not dispose of the water since we will need it again later). add the remainder of the glutinous rice flour to a mixing bowl and drop the cooked piece of dough in. add more soymilk to the mixing bowl in small amounts to ensure u do not make the dough too water. mix together the cooked piece of dough, remaining rice flour, and the added soymilk. Note: be careful as the dough may still be very hot!. It is natural for the dough to feel sticky and stick to your fingers in this step. the stickiness comes from the piece of cooked dough. The cooked dough is an important determining factor in the chewiness of the final product so don't omit this step!
4. once mixed into a smooth piece of dough, break the dough in to large marble sized pieces and roll into a ball. these balls will feel somewhat sticky so coat them with some more rice flour on the outside. Then use your thump and press down the middle of the balls in your plam so they form an indentation in the center. As a biologist, I would describe the shape you're trying to produce here as looking like a red blood cell.
5. bring to boil, a pot of water. you may reuse the pot of water previously used to boil the small piece of dough, but make sure the water is boiling first before you drop the piece of rice dough you just made into the pot. allow the dough to cook until it floats up, then allow it to cook an additional 30 seconds to 1 minute.
6. once the dough is cooked, remove them promptly from the boiling water and drop them into a pot/bowl of cold (prefably ice cold) water. This will add more chewiness to them. allow the dough to soak in the hot water until they are cool.
7. place the cooked rice balls in a small serving cup or bowl and pour soymilk until it its 3/4 the way to the top of the dough placed in the cup.
8. to add the finishing touches, lay some strawberries on top, scoop 1 scoop of green tea ice cream and lay some red bean paste on top of the ice cream. finally drizzle some condensed milk over the top.
There you have your home made soymilk rice ball dessert!
this recipe is pretty easy as it does not demand very many ingredients or too much experience in mixing and combining ingredients, it is relatively easy to succeed and of course is delicious!
that's my little experiment for today!
have fun in the kitchen ;)
-Ney
Subscribe to:
Posts (Atom)