Friday, March 30, 2012

Sichuan Style Eggplant! 魚香茄子

It’s been a while since i’ve been back. actually i haven’t checked my tumblr since the last time i updated. Anyhow, tonight i decided to try to make sichuan style eggplant 魚香茄子. it’s really not that difficult, and tastes really good too!
ingredients:
  • A. 2 tblsp. cooking wine (i used rice wine)
  • B. 1 tblsp. oyster sauce
  • C. 3 tblsp. hot chili bean paste
  • D. 1/2 tblsp. sesame oil
  • E. 1 tblsp. sugar
  • F. 1/2 lbs. ground pork
  • G. 4 eggplants
  • H. 1tblsp. ginger (minced)
  • I. 2 tblsp. garlic (minced)
  • J. 2 stalks scallions (minced)
Directions:
1. Cut eggplant into sticks and soak in lightly salted water for ~10 minutes.
2. drain the water from the eggplant. heat oil in a deep frying pan to deepfry eggpants.
3. deepfry eggplants for 2-3 minutes or until the eggplants appear to turn into a lighter hue of purple. remove from oil.
4. start another frying pan with some oil to stir fry the ground pork. stir fry until the ground pork is cooked, then add hot chili bean paste.
5. stir fry, then add minced garlic and ginger. stir fry until aromatic.
6. add the oyster sauce, sugar, wine and stir fry until well combined and cooked.
7. add eggplants into pan and stir fry until well combined.
8. add scallions and sesame oil. stir fry until even.
there you have your si chuan style eggplant!
it went so well with rice for dinner tonight! how spicy it actually is will depend on how spicy your chili bean paste is. I usually get lee kim kee cuz i feel the spiciness is pretty moderate. of course there are also spicier options out there depending on your preference.
nom nom nom (o^_^o)
-Ney

Monday, December 26, 2011

Matcha (Green Tea) Redbean and Black Tea Vanilla Cream Roll Cakes


Hello all!

It really has been a long while since my last update, these past few months have been pretty hectic and crazy for me, moving to anther state, getting settled in, and starting off again in a foreign place. One of my friends had requested that I do a post on my roll cakes. Frankly speaking, I haven't made one in quite a long time; since it's Christmas and my relatives invited me over for dinner, I thought it'd be a good opportunity to make some roll cakes again and also share this recipe with everyone! so here we go!

Materials:

A. 1 tsp baking powder
B. 1/2 tsp salt
C. Heavy whipping cream (used for filling, amount depends on preference)
D. 3 eggs
E. 1 cup sugar
F. 3/4 cup flour
G. 1/3 cup water
H. 1-1.5 tsp matcha powder (add according to preference)
Sweet red bean paste (not pictured)
vanilla extract (not pictured)


Directions:

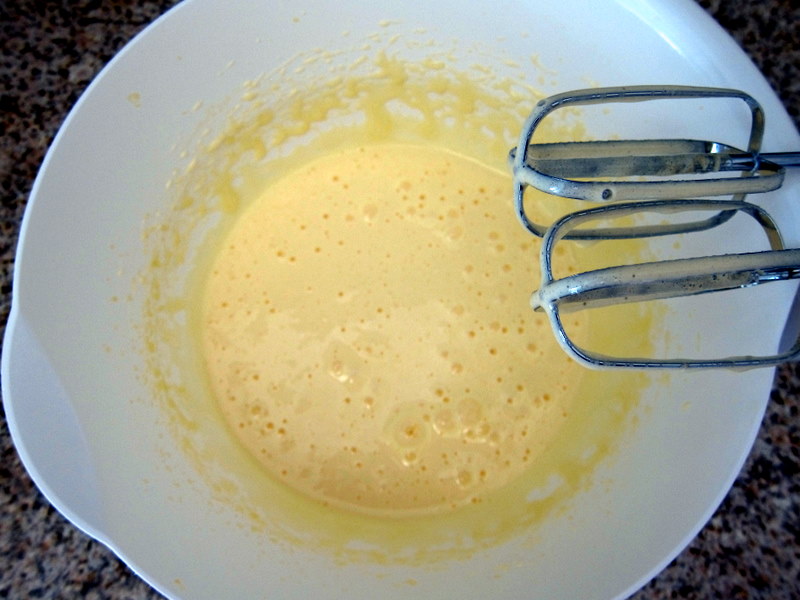
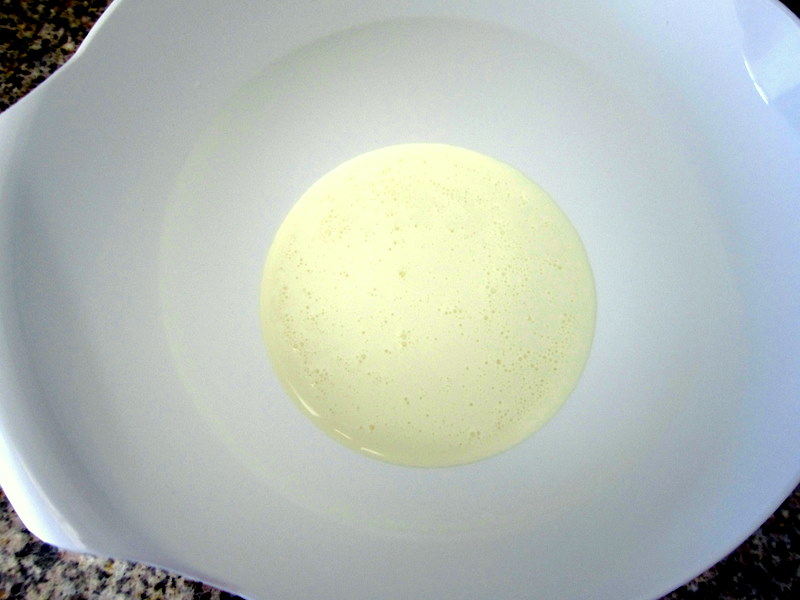
1. crack all 3 eggs into a large mixing bowl. mix with hand mixer at high speed until contents look slightly frothy and appears to be a light yellow color. The color of the egg mixture will appear to lighten as you mix it for a longer time.


2. Add in the sugar dash by dash mixing each dash well with the beaten eggs using a hand mixer. continue until all sugar is mixed into the bowl and the content appears to be smooth.
 
 
3. drip the water into the mixture slowly while mixing.
If you are making the black tea flavored cake, substitute the water in this step with an equal volume of black tea. black tea flavor is very light so try to make this very concentrated so you will get a stronger black tea flavor/aroma in the final product. As you can see, my 1/3 cup of black tea here is very dark/concentrated.


4. add in the flour dash by dash and mix until smooth.

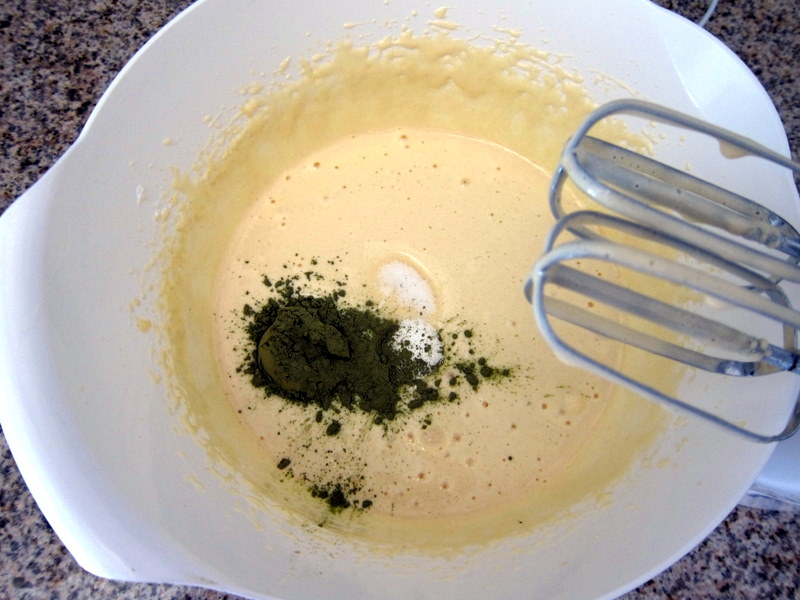
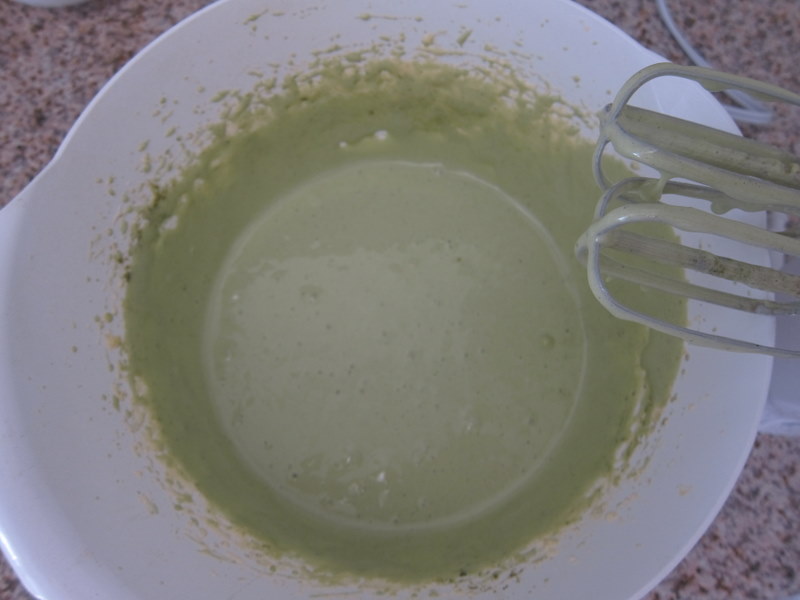
5. add in the baking powder, salt, and matcha powder. if you are making the black tea flavored cake, substitute the matcha powder with ground black tea leaves. you may add ~1-2 tablespoons of leaf grounds depending on your flavor preference. If you grind your own black tea leaves, you may get a stronger flavor/aroma, but u may also opt to cut open tea bags and dump the leaves from tea bags directly in since they are usually manufactured to a finer texture. mix contents until smooth. preheat oven to 375F.


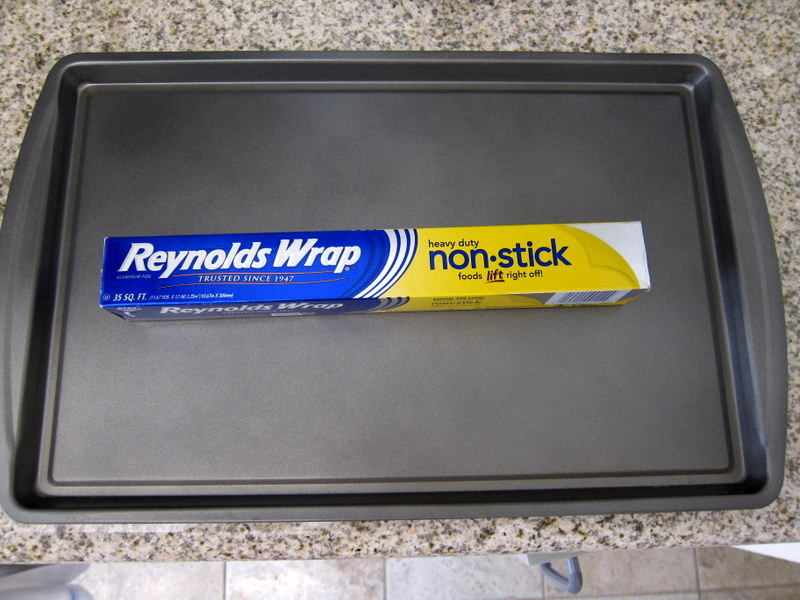
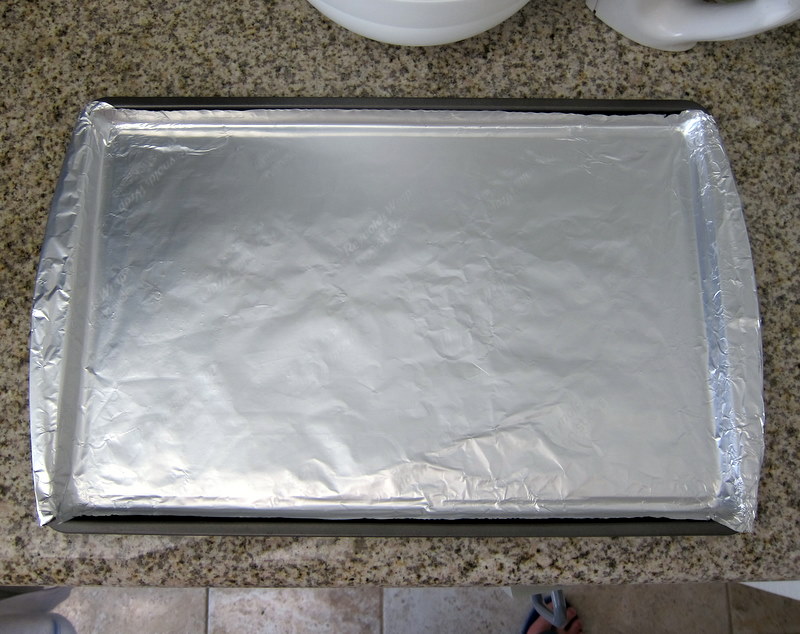
6. prepare a baking pan (i use a cookie sheet) and line it with non-stick aluminum foil.


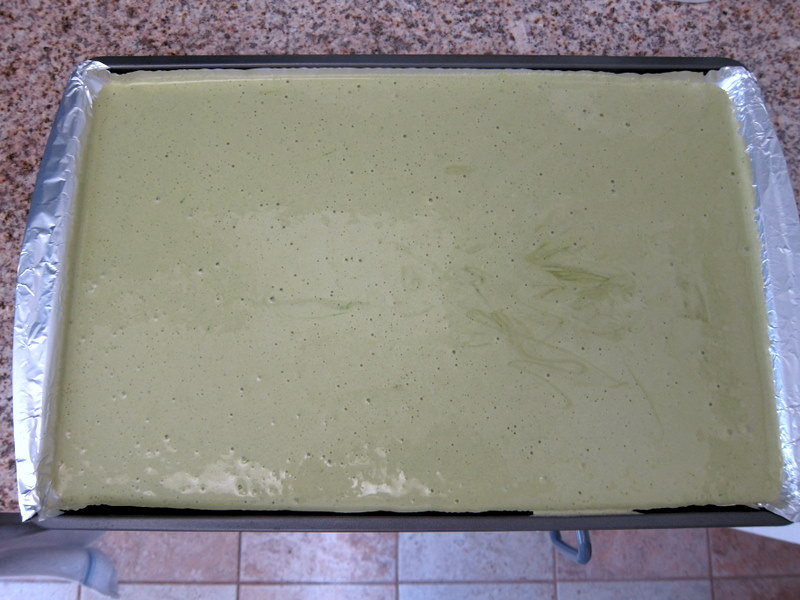
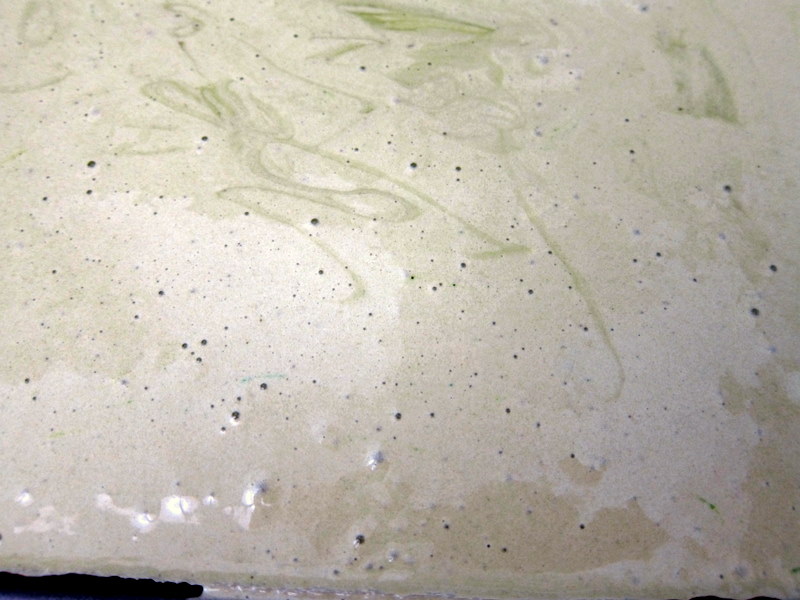
7. pour in the batter you have just made and spread it equally across the entire tray.


you might notice that bubbles will begin to surface on the batter inside the pan. these bubbles will expand and create an uneven texture on the cake in the oven, so drop the tray onto the counter from a low height and repeat several times to get rid of these surfacing visible air bubbles.


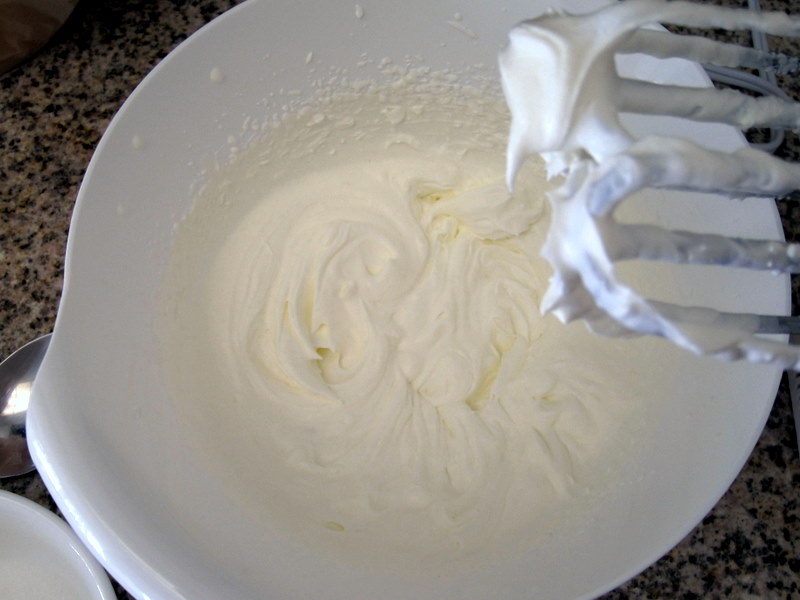
8. now place it on mid-rack in the pre-heated oven and bake for 13-15 minutes until fully baked. the edges may appear a bit crustier/brown. during this time, make the cream filling by whipping the heaving whipping cream until ribbony, then begin adding in sugar in small amounts while mixing until desired sweetness is reached, and the cream forms stiff peaks. For the vanilla cream filling (i paired this with the black tea cake), add in 1-1.5 tsp of vanilla extract, or more if you prefer. 


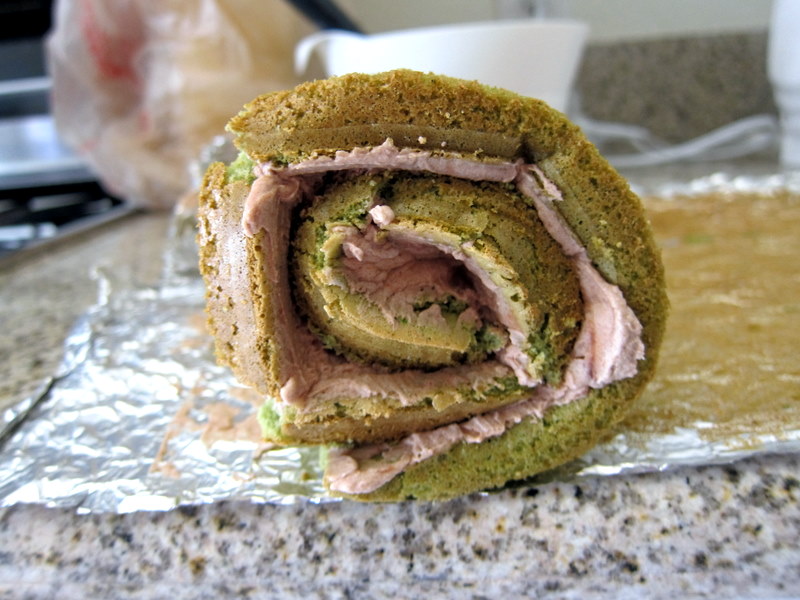
for the red bean cream filling (i paired this with the matcha cake), add in the red-bean paste, and mix together with the whipped cream.


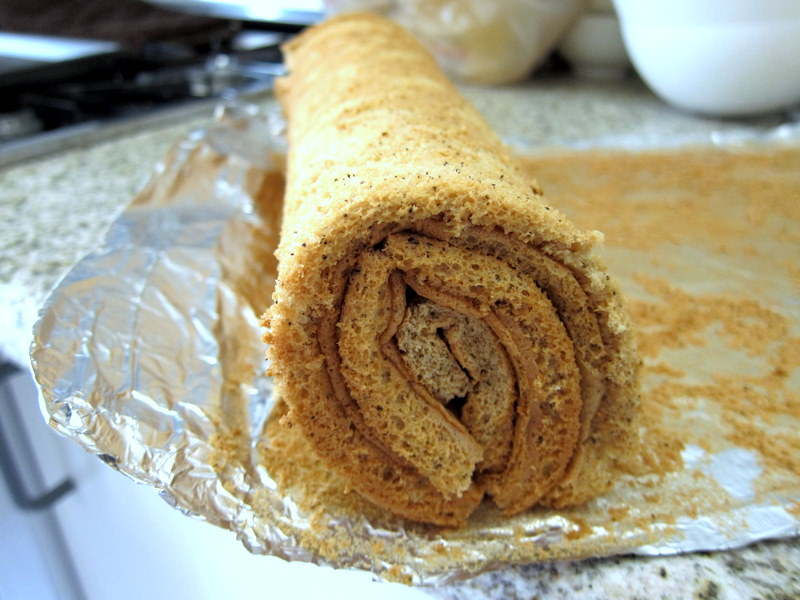
9. after time is up, remove the cake from the oven, and let cool on counter. carefully peel off the foil from the cake (this step should not be too difficult if the foil is non-stick, and also should not rip or break the cake). then cut off the crusty edges with a knife, and begin rolling the cake into a roll along the long side of the cake. do not put in the cream yet here. after the cake is rolled up, wrap it with foil and allow to chill/cool in the fridge for at least 10 minutes until cold.


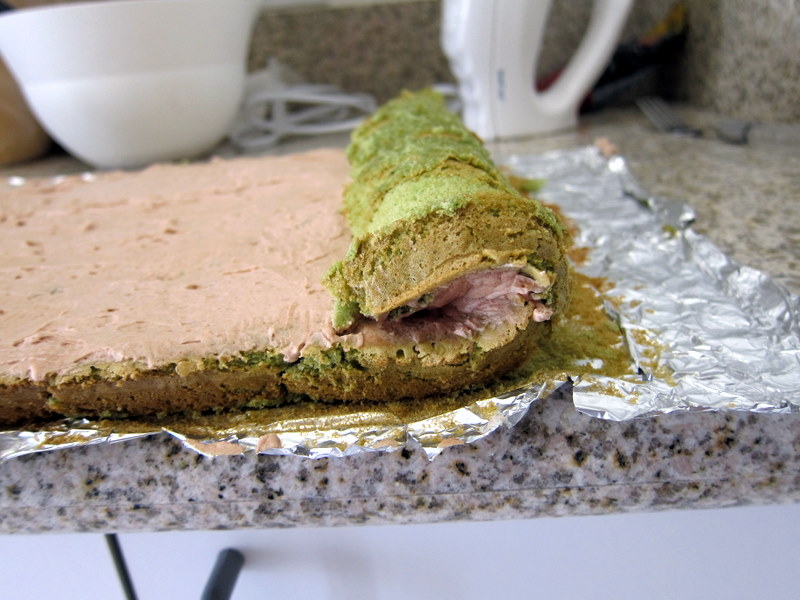
10. remove the cake from the fridge, unravel from the foil and roll out flat again. be careful the surfaces of the cake might be sticky so if u unroll it too quickly u might rip the cake if it's stuck together. do this slowly taking note of sticky areas. Then, smear the whipped cream filling that was previously prepared in step 8. smear it evenly over the entire area of the inner side of the cake (the side facing you)


then begin rolling it back into a roll again


11. as you can see, the ends of the cake look very rough, so after it has been rolled, use a knife to cut off a thin slice from each end to clean up the edges. roll it up again in foil, and refrigerate until ready to serve.

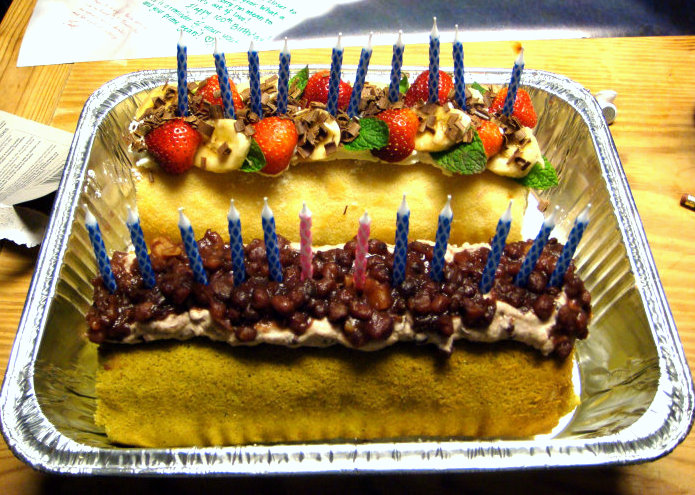
 voila, here you've just made your home-made roll cake! now bring it to a party and impress all your friends, or cut a slice off and pair it up with a cup of tea of coffee and enjoy! of course, you may also garnish the top of the cake by piping on any extra cream filling u might have had left over, or u may also use fruits. here I used sweet whole red beans over redbean whipped cream.


<3 ney

Saturday, July 9, 2011

thai style shrimp salad sushi!


It's been a while since i last made an extensive post about my fun in the kitchen so today I'm going to share my little experiment with making sushis. I saw a few posts on the internet about how to prepare the rice and saw the possibility of using cucumbers to wrap around the sushi, which i thought was just brilliant. I decided to do a thai-japanese fusion by using a thai style marinade to season the shrimp before putting it together as sushi. The steps to prepare it is actually not very difficult at all, it just takes some time. So here we go!

Materials:

A. Fish sauce
B. 1 tblsp white rice vinegar
C. shrimps (boiled)
D. 1 cup rice
E. minced garlic
F. red chili peppers
G. cilantro
H. lime (or lime juice)
I. minced ginger
J. lemon juice (or lemons)
K. 3/4 tblsp sugar
L. minced onion and/or shallots
M. cucumber (prefably not bent/curved in shape)
N. kelp


Directions:

1. wash 1 cup of rice with water and strain out the wash water and add in 1 cup of fresh water (you may scale this up if you plan to make a larger batch. the rice:water ratio is 1:1). gently rinse clean a piece of kelp (seaweed), and place it into the pot containing the rice and water. let sit for ~15 minutes. then place into rice cooker to steam. after rice is steamed, allow it to sit in the steamer for another 15 minutes before removing it.


2. while the rice is being cooked, prepare the vinegar needed to transform the rice into sushi rice. take 1 tablespoon of white rice vinegar and add in 3/4 tablespoons of sugar and a pinch of salt and stir until all crystals are dissolved.


3. once the rice is removed from the rice cooker, discard the piece of seaweed/kelp. Pour the vinegar mixture prepared in the previous step into the rice. Loosen the rice and combine it with the vinegar by digging and mixing. let the rice sit at room temperature until cooled (do not place it into the refrigerator).


4. while the rice is cooling,  prepare the thai shrimp salad by first boiling the shrimp in water until cooked. strain the shrimp, de-shell if necessary and mince into roughly the size of M&Ms. 


5. prepare the marinade by combining hot boiled water with the bottled fish sauce in a 1:1 ratio. add in 2 tablespoons of sugar, a pinch of salt, the red chili peppers and garlic. (the fish sauce you just made can be kept in the refrigerator for storage for a few weeks so you may make a larger batch to store if you wish). take out the portion of fish sauce to be used for marinating the shrimps and add in extra minced garlic if desired, minced ginger, cilantro leaves, red chili peppers, sugar, lemon juice, and lime juice. adjust the flavoring according to personal preference. mix and press on the contents to combine the aromas of all the spices used. The resulting marinade should ideally by a blend of sweet, sour, savory along with a hint of all the spices used.

additionally, you may also add in some plum sauce to add to the sweetness of the marinade. this is optional, but i personally like the resulting taste.


6. combine the minced shrimp prepared in step 4 with the marinade prepared in step 5. fold and mix the contents together and allow the shrimp to marinate for at least 30 minutes.


7. prepare the rice for assembly into sushis while the shrimp is sitting in the marinade. the rice should be cooled at this point, place a piece of saran wrap over a plate or on a clean counter top and obtain another piece that will be used to shape the rice into riceballs. 


8. obtain a scoop of rice onto the piece of saran wrap and squeeze the rice into a rice ball with the saran wrap between your palms and the rice. shape it into an ovular ball around the size of an avacado pit. and place onto the plate with the saran wrap. repeat this step to prepare all the rice.


9. wash the cucumber, you may use the coarse side of a clean dish sponge to gently rub the cucmber to clean off any tiny specs on the skin. then use a fruit skinner and glide it down the long-side of the cucmber to make the cucumber skins for the sushi.


10. wrap 1 slice of the cucumber skin around each rice ball prepared in step 8.


11. the shrimp should be finished marinating now. scoop out some of the marinade and drip a few drops onto each sushi.


12. fill the tops of each sushi with the marinated shrimp along with all the onion and garlic and ginger, and spices added. i picked out the red chili peppers as those tend to be too spicy if they are accidentally bit on, and also moved all the cilantro to the top of the sushis for garnishing.


and voila! there you go, home made thai shrimp salad sushis! now sit down and enjoy the sweet/sour/savory/spicy sushis!


questions? concerns? suggestions? leave me a comment and I will make sure I get back to you!

Have fun in the kitchen :)


Ney